
TIG Welding Explained for Beginners: The Torch, the Filler Rod, and the Foot Pedal
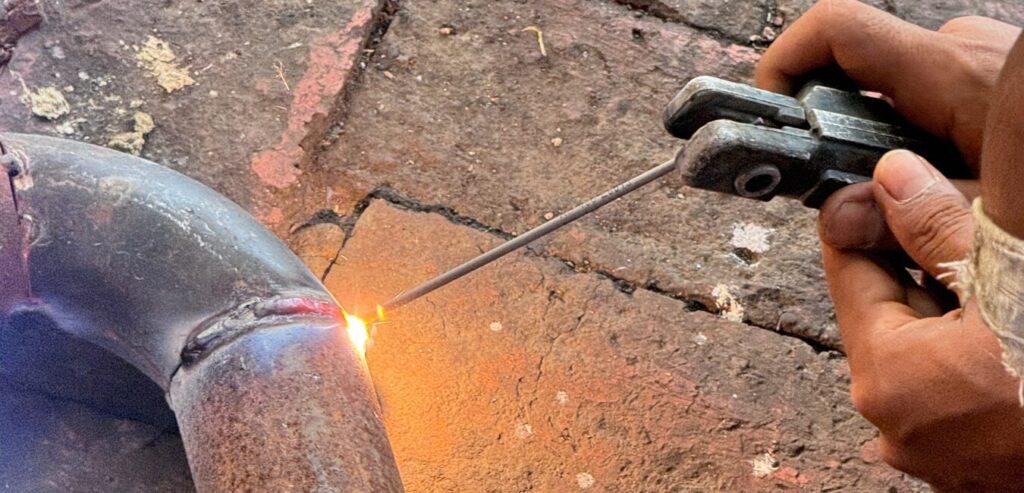
TIG welding has a reputation for being the hardest arc welding process to learn. That reputation is earned. You control the torch angle with one hand, feed a filler rod with the other, and regulate amperage with a foot pedal, all while watching a puddle the size of a pencil eraser. But TIG also produces the cleanest, most precise welds of any manual process.
This post covers TIG welding basics from the ground up: how does TIG welding work, what equipment you need, and how to build the coordination that makes it come together.
How Does TIG Welding Work
TIG stands for Tungsten Inert Gas. The technical name is GTAW (Gas Tungsten Arc Welding). With GTAW welding explained simply: an electric arc forms between a non-consumable tungsten electrode and the workpiece, melting the base metal while a separate filler rod is hand-fed into the puddle. Argon shielding gas flows through the torch cup to protect the molten metal.
The key difference from MIG: the electrode does not melt. The tungsten stays intact and only creates the arc. Filler metal comes from a separate rod. This gives you independent control over heat and filler, which is why TIG produces such precise welds.
Understanding how TIG welding works explains the steep learning curve. You manage three independent variables simultaneously instead of pointing a gun and pulling a trigger. GTAW welding explained at its core is about separating heat control from filler deposition.
What You Need to Get Started
Here is the equipment list for TIG welding for beginners:
| Equipment | What to Get |
|---|---|
| TIG welder | AC/DC machine for aluminum and steel; DC-only for steel and stainless |
| Torch | Air-cooled for light duty; water-cooled for higher amperage |
| Tungsten electrodes | 2% ceriated (gray) or 2% lanthanated (blue) for general use |
| Filler rod | ER70S-2 for steel, ER308L for stainless, ER4043 for aluminum |
| Shielding gas | 100% argon (most common) |
| Gas regulator | Argon-rated flowmeter regulator |
| Foot pedal | Usually included with the machine |
| PPE | Auto-darkening helmet (shade 10-13), thin leather TIG gloves, long sleeves |
CryoWeld carries Lincoln Electric TIG welders, Weldcraft torches, filler rod, argon cylinders with regulators, and Jackson Safety and Tillman PPE at both locations.
The Three Things You Control
TIG welding basics come down to three things your body manages at the same time. Mastering each one separately before combining them is how to TIG weld without overwhelming yourself.
The Torch
- Hold the tig torch like a pencil at about a 15 to 20 degree angle from vertical, tilted in the direction of travel.
- The tungsten tip should hover about 1/8 inch above the workpiece.
- Too close and you dip the tungsten into the puddle (which contaminates it).
- Too far and the arc becomes unstable.
- Keep a steady hand and move at a consistent speed.
For TIG welding for beginners, the most common mistake is moving too fast. Slow, smooth travel gives the puddle time to form and flow properly.
The Filler Rod
- Hold the filler rod at a low angle (about 15 degrees from the workpiece).
- Feed it into the leading edge of the puddle with a dipping motion: dip, retract, advance, dip again. The rod should never touch the tungsten.
- Keep it close to the puddle even when not dipping so it stays warm and within the gas shield.
The Foot Pedal
- The foot pedal controls amperage in real time.
- Press down for more heat, ease off for less. This is what gives TIG its precision.
You can increase heat at the start of a joint to establish the puddle, then back off as the metal heats up, and feather down to zero at the end to prevent a crater crack.
Learning how to TIG weld with a foot pedal takes practice. Start by getting comfortable varying the pressure smoothly without looking at your foot. Your eyes stay on the puddle at all times.
How to TIG Weld: Your First Practice Session
With GTAW welding explained above, here is how to TIG weld in a structured progression:
- Start on scrap mild steel (1/8 to 3/16 inch). Set the machine to DCEN.
- Run stringer beads without filler rod first. Focus only on torch angle, arc length, and travel speed.
- Add the filler rod once torch control is steady. Practice the dip-and-advance rhythm on straight lines.
- Add the foot pedal last. Practice ramping heat up at the start and feathering down at the end.
This progression is the most effective way to learn how to TIG weld because it separates the three skills instead of forcing them all at once.
What Metals Can You TIG Weld
TIG works on more metals than any other manual arc process. Here is a quick guide:
| Metal | Polarity | Gas | Filler Rod |
|---|---|---|---|
| Mild steel | DCEN | 100% argon | ER70S-2 |
| Stainless steel | DCEN | 100% argon | ER308L or ER316L |
| Aluminum | AC | 100% argon | ER4043 or ER5356 |
| Copper | DCEN | Argon or argon/helium | ERCu |
| Titanium | DCEN | 100% argon (full coverage) | Matching grade |
| Chromoly (4130) | DCEN | 100% argon | ER70S-2 or ER80S-D2 |
Aluminum requires AC polarity because the alternating current cleans the oxide layer during the positive half of the cycle. All other metals listed use DCEN (electrode negative). This is one of the TIG welding basics that trips up beginners who come from MIG, where polarity is almost always DCEP.
Getting Started at CryoWeld
TIG welding for beginners starts with the right equipment. CryoWeld carries everything you need for a complete TIG setup, from AC/DC welding machines to torches, tungsten, filler rod, argon, and safety gear.
GTAW welding explained at the counter is faster than figuring it out from a manual. Stop by Poughkeepsie or Lake Katrine in the Hudson Valley. Call Poughkeepsie at (845) 473-3357 or Lake Katrine at (845) 336-8680, weekdays 8 to 5. Or visit cryoweld.com.
FAQs
Is TIG welding hard to learn for beginners?
TIG has the steepest learning curve of any manual arc process because you control the torch, filler rod, and foot pedal independently. Most beginners need 20 to 40 hours of practice before producing consistent beads. But the precision and weld quality TIG offers make it worth the investment for anyone doing thin material, pipe, or appearance-critical work.
What is the difference between TIG and MIG welding for a beginner?
MIG feeds wire automatically and is point-and-shoot. TIG requires manual filler rod feeding, a non-consumable tungsten electrode, and a foot pedal for amperage control. MIG is easier to learn. TIG produces cleaner, more precise welds but demands more coordination and practice.
Do you need a foot pedal for TIG welding?
For most TIG welding for beginners, yes. The foot pedal gives real-time amperage control, which is essential for managing heat on thin material and feathering out at the end of a joint. Some torches offer fingertip amperage controls instead, but the foot pedal is the standard.
What metals can you weld with a TIG welder?
Steel, stainless steel, aluminum, copper, titanium, chromoly, nickel alloys, and magnesium. TIG works on a wider range of metals than MIG or stick. Use DCEN polarity for most metals and AC for aluminum.
How long does it take to learn TIG welding?
Most beginners can run acceptable beads on flat steel after 20 to 40 hours of focused practice. Proficiency on multiple positions, metals, and joint types takes 6 to 12 months of regular welding. TIG welding basics like torch angle and travel speed come first. Filler rod and pedal coordination develop over time.